Selfie Capture
About this guide
This guide is designed to assist you in the integration with the Flutter SDK in a fast and easy way. On this page, you find some key concepts, implementation examples, as well as how to interact with the Biometric Engine REST APIs.
Please note that this guide focuses on the image capture process. For more information about the REST APIs of Unico Check, please refer to REST API Reference guide.
Following this guide, you are able to:
- Learn how to open user's camera and capture an image;
- Learn how to link the parameters returned by the SDK with the REST APIs;
- Learn how to deal with the data returned by the REST API;
Before you begin
The step-by-step instructions on Getting started guide to set up your account, get your API key and install the SDK must be completed. It is also recommended that you check the available features of this SDK on the Overview page.
Available resources
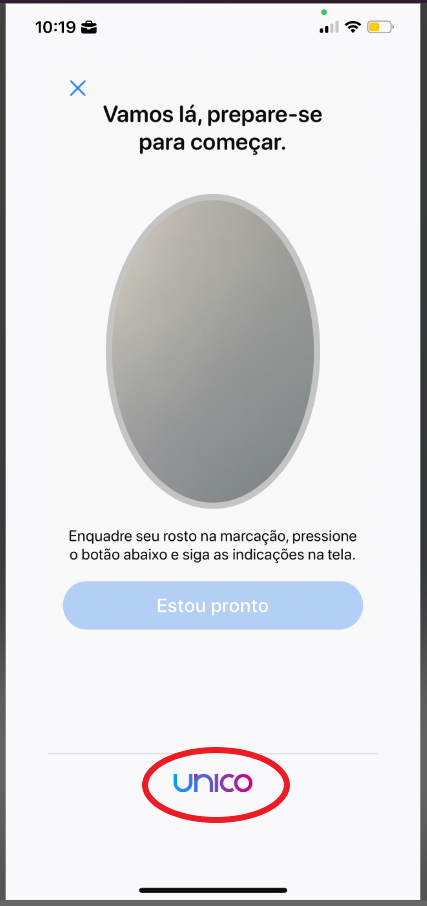
This SDK offers a component that allows you to capture optimized images in your app, displaying your users a silhouette that helps them to get correctly positioned for the image capture.
You can offer one of the following Selfie Capture modes in your app:
Manual Capture
The SDK displays a frame to help users to correctly position their faces. The users are then responsible for capturing the image by clicking on a button (also provided by the SDK).
The SDK does not perform any kind of validation of what is being captured. If the captured image does not have what is considered a biometrically valid face, the JWT generated by the SDK is rejected by the Biometric Engine REST API.

Automatic Capture
The SDK automatically identifies the face of the users through the computer vision algorithms and helps them to position themselves correctly within the capture area. Once correctly positioned, the image is captured automatically.
Problems when sending the JWT to the biometric engine APIs are minimized as this option helps the user to frame their face in the capture area.

Smartlive with interaction FaceTec
In this kind of experience, users are instructed to perform some simple movements during the image capture. Those movements are then verified by some computer vision algorithms, in order to ensure that users are really in front of the phone. By requesting users to move in front of the camera, this kind of experience adds an extra security layer against frauds.
As in the Automatic Capture mode, the image here is captured without users pressing any button. This option can also dramatically reduce problems when sending the JWT to the Biometric Engine REST API.
This functionality must be activated inside the Unico Customer Portal, as explained in this article.
Implementation
Follow the steps below to have the full potential of the SDK embedded in your app.
Initialize the SDK
First, import the SDK and implement the interface
AcessoBioManagerDelegateinside your ViewController.- Objective-C
- Swift
.m:
#import "ViewController.h"
#import <AcessoBio/AcessoBio.h>

@interface ViewController ()

@end

@implementation ViewController

- (void)viewDidLoad {
    [super viewDidLoad];

    unicoCheck = [[AcessoBioManager alloc]initWithViewController:self];
}

- (void)onErrorAcessoBioManager:(ErrorBio *)error {
    code
}

- (void)onSystemChangedTypeCameraTimeoutFaceInference {
    code
}

- (void)onSystemClosedCameraTimeoutSession {
    code
}

- (void)onUserClosedCameraManually {
    code
}
import UIKit
import AcessoBio
class ViewController: UIViewController, AcessoBioManagerDelegate {
var unicoCheck: AcessoBioManager!
override func viewDidLoad() {
super.viewDidLoad()
unicoCheck = AcessoBioManager(viewController: self)
}
func onErrorAcessoBioManager(_ error: ErrorBio!) {
// your code
}
func onUserClosedCameraManually() {
// your code
}
func onSystemClosedCameraTimeoutSession() {
// your code
}
func onSystemChangedTypeCameraTimeoutFaceInference() {
// your code
}
}ENVIRONMENT CONFIGURATION
Configure the environment that will be used when running the SDK. Use the enumerated
Environment, which contains the following enumerations:PROD: for the Production environmentUAT: for the Testing environmentSee how to implement it in the example below:
- objectivec
- swift
[unicoCheck setEnvironment:UAT];unicoCheck.setEnvironment(.UAT)This implementation can be done with just some lines of code. Override the callback functions with your business rules. Each one of the callback functions is invoked as detailed below:
onErrorAcessoBioManager(_ error: ErrorBio!)MethodThis callback function is invoked whenever an implementation error happens. For example, when informing an incorrect or inexistent capture mode while configuring the camera.
Once invoked, this callback function receives an object of type
ErrorBiocontaining the error details. Learn more about the typeErrorBioin the iOS SDK references document.onUserClosedCameraManually()MethodThis callback function is invoked whenever an user manually closes the camera. For example, when clicking on the "Back" button.
onSystemClosedCameraTimeoutSession()MethodThis callback function is invoked whenever the timeout session is reached (Without capturing any image).
Timeout SessionThe timeout session can be set with the builder using the
setTimeoutSessionmethod. The timeout session setting must be in seconds.onSystemChangedTypeCameraTimeoutFaceInference()MethodThis callback function is invoked whenever the timeout for face detection is reached (without detecting any face). In this case, the capture mode is automatically changed to the manual mode (the one without the smart frame).
Be carefulAll the above callback functions must be declared in your project (Even without any business rules). Otherwise, you won't be able to compile your project.
Configure capture mode
As explained in the section above, there are three capture modes. If you are not using the Smartlive with interaction - FaceTec mode, in this step you can choose between Manual or Automatic capture modes.
Tip Smartlive with interaction - FaceTecIf you are using the capture mode Smartlive with interaction - FaceTec, a standard experience is provided and can not be customized, therefore, this configuration might be irrelevant to you.
However, it is recommended that you configure a capture mode in your builder, because if you disable the Smartlive with interaction - FaceTec mode inside your Customer Area, you do not need to change your code.
The SDK is configured, by default, with both Smart Frame and Auto Capture enabled. To use the camera in manual mode, you have to disable both features using the
setAutoCaptureandsetSmartFramemethods. Below you can find out how to configure the camera mode:The following examples shows you how to configure each on of the methods from a button in your UI.
Smart Camera (Automatic Capture)
If you decide to use both default functionalities, you don't need to configure anything in this step.
If the camera configurations were previously modified in your app, you can restore it by using the
setAutoCaptureandsetSmartFramemethods:- Objective-C
- Swift
.m:
- (IBAction)configureSmartCamera:(UIButton *)sender {

    // Objeto unicoCheck da classe AcessoBioManager
    [unicoCheck setSmartFrame:true];
    [unicoCheck setAutoCapture:true];

}
@IBAction func configureSmartCamera(_ sender: Any)
// Objeto unicoCheck da classe AcessoBioManager
unicoCheck.setSmartFrame(true)
unicoCheck.setAutoCapture(true)
}Automatic Capture without Smart Frame.It is not possible to set
setAutoCapturetotrueandsetSmartFrametofalse. In other words, it is not possible to use Automatic Capture without the Smart Frame, as this component makes the intelligent framing to the image capture.Manual mode
To use the manual mode, both default configurations must be set to false using the
setAutoCaptureandsetSmartFramemethods:- Objective-C
- Swift
.m:
- (IBAction)configureSmartCamera:(UIButton *)sender {

    // Objeto unicoCheck da classe AcessoBioManager
    [unicoCheck setSmartFrame:false];
    [unicoCheck setAutoCapture:false];

}
@IBAction func configureSmartCamera(_ sender: Any) {
// Objeto unicoCheck da classe AcessoBioManager
unicoCheck.setSmartFrame(false)
unicoCheck.setAutoCapture(false)
}Tip: Manual mode with Smart FrameYou can use the Smart Frame with the manual mode. In this case, a silhouette is displayed to the users, helping them to correctly frame themselves to enable the capture button. To enable this configuration, set AutoCapture to
falseand Smart Camera totrue.Implement delegates to camera events
Through the implementation of the delegates, you can configure what happens in your App in both error or success cases when capturing an image. To do this, use the
onSuccessSelfieoronErrorSelfiemethods, respectively.To configure the delegates, you have to implement the interfaces
SelfieCameraDelegateandAcessoBioSelfieDelegate:- Objective-C
- Swift
.h:
#import <UIKit/UIKit.h>
#import <AcessoBio/AcessoBio.h>
#import "SelfieCameraDelegate.h"

@interface ViewController : UIViewController < AcessoBioManagerDelegate,
          SelfieCameraDelegate,
          AcessoBioSelfieDelegate> {

    AcessoBioManager *unicoCheck;
    // Your code from previous and next steps here ;)
}
import UIKit
import AcessoBio
class ViewController: UIViewController,
AcessoBioManagerDelegate,
SelfieCameraDelegate,
AcessoBioSelfieDelegate {
//Your code from previous and next steps here ;)
}onSuccessSelfieMethodThis method is invoked whenever an image is successfully captured. Once invoked, this function receives an object of type
SelfieResultthat is used latter to call the Rest APIs.- Objective-C
- Swift
- (void)onSuccessSelfie:(SelfieResult *)result {
    NSLog(@"%@", result.base64);
}
func onSuccessSelfie(_ result: SelfieResult!) {
    // your code
 }
A successful response includes the
SelfieResultobject with the following attributes:base64: This attribute can be used in the case you want to display a preview of the captured image in your app;encrypted: This attribute must be sent to the unico check REST APIs as detailed here);
Converting a Base64 to BitmapIf you want to convert a Base64 string into a Bitmap image, the standard way won´t work in iOS. Learn more at this Stack Overflow article.
AlertThe Encrypted attribute is strictly intended for sending the image through the Unico APIs. You should not open and serialize this attribute, as its characteristics may change without notice. Its use must be exclusive in interactions with the APIs to guarantee the data integrity and security. Unico is not responsible for any damages arising from this practice, since the changes may occur unpredictably.
onErrorSelfieMethodThis method is invoked whenever an error happens while capturing an image. Once invoked, this callback function receives an object of type
ErrorBiocontaining the error details. Learn more about the typeErrorBioin the iOS SDK references document.- Objective-C
- Swift
- (void)onErrorSelfie:(ErrorBio *)errorBio {
    // Your code
}
func onErrorSelfie(_ errorBio: ErrorBio!) {
    // Your code
 }
Object ErrorBioLearn more about the type
ErrorBioat iOS SDK references document.Customize the capture frame
Optional stepThis step is optional but recommended.
You can customize the capture frame in the SDK. To customize it, you just need to use the method corresponding to the property to be customized and apply the change with the
setTheme()method.Learn more about the
setTheme()method and the customization possibilities at iOS SDK reference documentation.CUSTOMIZE LANGUAGE
You can configure the information message experience of capture frames by changing their language. Use the
LocaleTypesenumeration that contains the following values:Comments1- This feature is only available for Smartlive cameras with interaction (Facetec)
2- Remote activation may be required to be used, if you wish to use it, please activate the account CSM.
3- If not configured, by default the iOS SDK uses Portuguese as the main language.LocaleTypes.PT_BR: for Portuguese (Brazil)
LocaleTypes.ES_MX: for Spanish(Mexico)
LocaleTypes.ES_ES: for Spanish(Spain)
LocaleTypes.EN_US: for English(US)See how to implement it in the example below:
- Objective-C
- Swift
[unicoCheck setLocale:EN_US];unicoCheck.setLocale(.EN_US)ENVIRONMENT CONFIGURATION
Default configurationIf not configured, the SDK uses the environment configured in the configuration file (getHostKey). If getHostKey is not being used, an error is returned.
It is possible to configure the environment that will be used to run the SDK. Use the enumerated
EnvironmentEnumwhich contains the following enumerated:EnvironmentEnum.PROD: for Production environmentEnvironmentEnum.UAT: for Approval environmentSee how to implement it in the example below:
- Objective-C
- Swift
[unicoCheck setEnvironment:PROD];unicoCheck.setEnvironment(.PROD)HOW TO CUSTOMIZE LIVENESS INTERACTIVE WITH YOUR LOGO
For an authentication experience more associated with your brand, you can insert and customize your logo in real time.
Add an image to your project with the following name
unico_custom_footer_logo.NoteThe file must have the correct name. Otherwise the implementation does not work.
When you run the project again, your logo should appear at the bottom of the screen as shown below:
Prepare and open the camera
First, the
prepareSelfieCameramethod is used to receive the implementation of the classSelfieCameraListenertogether with the SDK credentials as parameters. The classes are configured in this step.- Objective-C
- Swift
.h:
#import <UIKit/UIKit.h>
#import <AcessoBio/AcessoBio.h>
#import "SelfieCameraDelegate.h"

@interface ViewController : UIViewController < AcessoBioManagerDelegate,
SelfieCameraDelegate, AcessoBioSelfieDelegate> {

    AcessoBioManager *unicoCheck;
}

.m:
- (IBAction)openCamera:(UIButton *)sender {

    // with AcessoBioConfigDataSource implementation
    [[unicoCheck build] prepareSelfieCamera:self config: [YourUnicoConfigClass new]];

    // or

    // with JSON config
    [[unicoCheck build] prepareSelfieCamera:self jsonConfigName: @""];
}
import UIKit
import AcessoBio
class ViewController: UIViewController, AcessoBioManagerDelegate,
SelfieCameraDelegate, AcessoBioSelfieDelegate {
@IBAction func openCamera(_ sender: Any) {
// with AcessoBioConfigDataSource implementation
unicoCheck.build().prepareSelfieCamera(self, config: YourUnicoConfigClass())
// or
// with JSON config
unicoCheck.build().prepareSelfieCamera(self, jsonConfigName:
"json-credenciais.json")
}
}Once the camera is ready, the
onCameraReadymethod is triggered receiving as parameter an object of typeAcessoBioCameraOpenerDelegate. You must override this method and open the camera using theopen()method that receives as parameter, the listeners configured in the step above. You must override this method and open the camera using theopen()method.- Objective-C
- Swift
- (void)onCameraReady:(id)cameraOpener {
    [cameraOpener open:self];
}

- (void)onCameraFailed:(NSString *)message {
    code
}
func onCameraReady(_ cameraOpener: AcessoBioCameraOpenerDelegate!) {
cameraOpener.open(self)
}
func onCameraFailed(_ message: String!) {
code
}In the case of an error, the event
onCameraFailedis triggered. You must override this method, handling the exception, with your business rules.Call the REST APIs
Capturing the images is just the first part of the journey. After capturing the image, it is necessary to send the generated Encrypted to the APIs, selecting one of the available flows detailed in Flows.
AttentionFor security reasons, the interval between generating the Encrypted and sending it via one of the available flows must be a maximum of 10 minutes. Submissions made beyond this period will be automatically rejected by the API.
Getting help
Are you missing something or still need help? Please, please get in touch with the support team at help center).
Next steps
- Learn how to capture image of documents with the SDK.
- Learn more about the SDK in the Reference documentation.
- Check the REST APIs documentation.